The Ultimate Beginner’s Guide to Smartphone Filmmaking
This guide is intended for people who haven’t done any, or little, smartphone filmmaking. Often, the feeling is – where do I start? Because you feel there’s so much to know, and it’s overwhelming. The mountain just looks too big to climb, so you put it off for another day.
I’ve tried to put enough information here to get you started, without burdening you with too much information and technical jargon (which can sometimes be off-putting for new filmmakers).
Learn by Doing
Firstly, when you’re shooting on a smartphone, the basic principles of filmmaking apply. Pretty much every film or video camera is essentially doing the same job. So if you want to learn how to make films, I say go ahead – take the camera you have access to and learn by doing.
You will learn a lot from shooting and editing. Those 2 activities are at the centre of what you produce as a filmmaker. And there are tons of books, websites and tutorials on the web which will cover more knowledge than you will ever be able to fit inside your head.
Secondly, there really are no rules. Filmmaking is an art and you will discover your own voice, and your own method, by making films. There’s no short cut to becoming a filmmaker other than to spend as much time as you can filmmaking.
However, when it comes to smartphone filmmaking, there are a number of things to think about, specific to the device. So here’s a breakdown:
You will need to think about stabilization
Stabilization isn’t always required, but if you’re doing handheld work you will get shaky shots.
Well, you might want shaky shots, because it feels more human. If you’re filming a running shot, it’ll be wobbling all over. And you might want that. It won’t be relaxing to watch, but it will be urgent. Shaky camera can put the audience more into the mind of the character/s, this way.
Imagine you’re filming a character running away from an angry grizzly bear. If the shot is perfectly smooth, it’ll be fine – but the audience will feel like onlookers, witnesses to a poor guy running in terror. However, if the shot is jerking around chaotically, in pace with the character running for his life, the audience will almost feel like they are in the scene, running for their lives too…
If you’re thinking about stabilizing your camera, there’s different types available. The most obvious one is mounting your smartphone on a tripod, or similar device. Simply holding the camera in your hands will result in the most shakiness. Because the camera is so small and light, any slight movement is exaggerated.
Tripods
Here’s our list of the Best Smartphone Tripods.
Mounted on a tripod, your camera will be stationary and your shot options will be limited to completely still, pan left and right or tilt up and down. But if you want to keep your camera mobile, here are some other options:
Optical Image Stabilization (OIS)
Optical Image Stabilization works by moving lens elements to counteract wobbly hand-induced camera shake. It’s now a mainstay feature of flagship smartphones.
OIS is great for stills photography, but it can cause issues with video. You might notice a strange wobbly effect as you’re watching your footage back, especially if your camera is making sharp movements. If you are panning or walking slowly whilst filming, OIS can usually handle it.
Here’s an example:
The filmmaker isn’t even moving. I’m certainly no expert in this field, but I believe the buffeting of the wind is creating lots of sharp camera movements, which the OIS then tries to rectify, creating a weird jelly-like effect in parts of the image. With slower movements, this effect is less noticeable.
For that reason, you might be advised to switch off the OIS completely, as natural hand shake is probably less of an issue. I’ve been a victim of this in my films and am still working out how best to avoid the wobblyness.
Read more: Smartphone Camera Stabiliser – EIS or OIS?
Non-Mechanical Grip
If your device doesn’t have OIS, or if you just want to add a little extra stabilization, or if you simply don’t like the way OIS works, to remove some of that exaggerated movement caused by the smallness of the smartphone, you can attach a simple grip. Before motorized gimbals became the thing to use, many smartphone filmmakers turned to these simple grips to add some weight and size and… well… grip to your device.
Simple Mechanical Grip: the Gimbal
A gimbal is a pivoted support that allows the rotation of an object about a single axis. A simple hand grip and counter-weight like this adds some smoothness to your handheld shots.
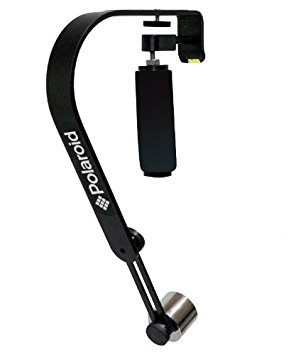
The pivot and weight counteracts the movement of your hand, to some extent. There’s a load of these available and they’re not too expensive. However, the pivot-weight mechanism can become your enemy if it starts to swing around like a pendulum.
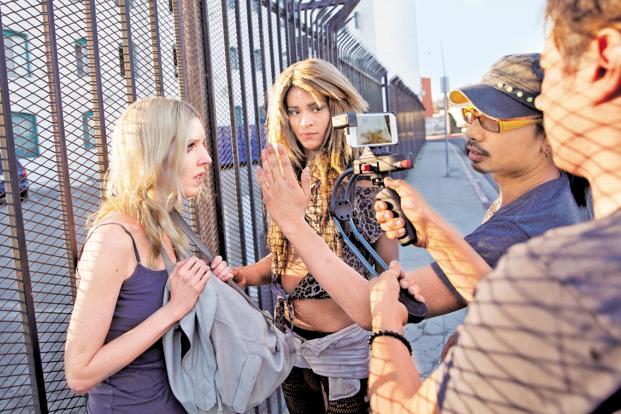
You can see in this picture above Sean Baker (filming Tangerine) using his left hand to stop that counter-weight swinging around.
Motorized Gimbal
Handheld 3-axis gimbals are used in stabilization systems designed to give the camera operator the independence of handheld shooting without camera vibration or shake. Powered by three brushless motors, the gimbals have the ability to keep the camera level on all axes as the camera operator moves the camera.
In short: the 3-axis gimbal works to give your footage a smooth, gliding look. The kind of shot that used to require an expensive SteadiCam set-up, can now be achieved with your phone using a device which can cost less than $100.
Here’s our list of the Best Smartphone Gimbal Stablizers.
Personally, I use a Zhiyun Smooth-Q. I actually have 2, as they are pretty affordable and it’s good to have backup (I’ve never needed the spare one so far). This is pretty much as far as you can go for optimal stabilization. However there are other improvisations which have been used in indie filmmaking for decades…
You will need to think about manual control
It’s perfectly ok to shoot using your smartphone camera’s automatic controls. In fact, smartphone cameras are really designed to be used that way. They are designed primarily for ease of use.
Low-budget digital filmmakers often have a bit of an obsession with something that has become known as the “cinematic look”. However, how you shoot your film is an entirely creative choice. You might find you like what the automatic controls do, or that they are simply more convenient when getting a certain shot.
For example, what if a shot really requires speed on your part? Hesitation might cause you to miss the moment. In which case, keeping controls set to automatic will help you focus on nothing but getting that shot.
That said, you should seriously think about using manual controls. On automatic, as you move the camera the image will change: the exposure settings will change as the light changes, the focus point adapts to whatever object is in the focus finder, and the colour balance can change too.
If you pan left or right, unless the area you are filming has uniform lighting, the automatic exposure on your camera will start shifting the settings as the camera moves.
So how do you use manual controls on a smartphone camera?
Most smartphones come with their own operating system for the camera. Usually, by opening the camera app on your phone, you will find some settings somewhere which allow you to start setting the camera manually. Operating systems vary, according to the phone. So you will have to explore and experiment with your own device to see what can be done.
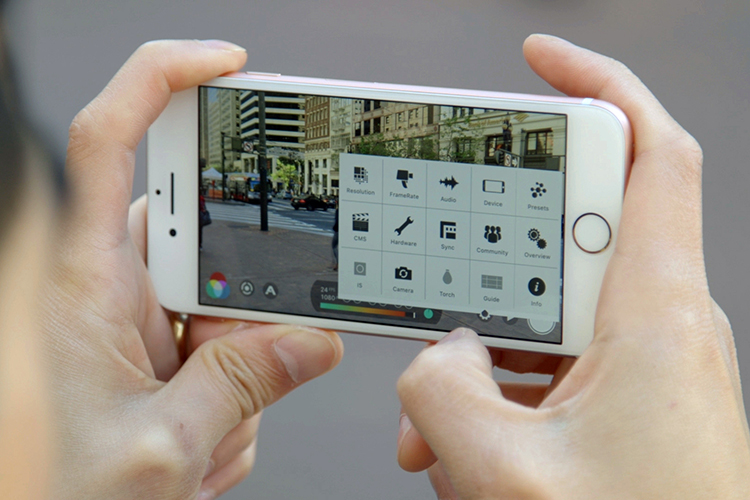
Camera apps
If you find your inbuilt camera app to be tricky or limiting, there are a number of downloadable video camera apps, for both iOS and Android. These apps generally make your smartphone camera easier to control.
By far the most well known is FiLMiC Pro. This app has famously been used by many well-known filmmakers, including Sean Baker and Steven Soderbergh, who both shot feature films using the iPhone and FiLMiC Pro combo. And if you consider they have both directed Oscar-nominated or Oscar-winning films, there really can no doubt that these are serious tools for serious filmmakers.
I’m not going to go into the details of how to use FiLMiC or other camera apps. There’s already a huge amount of tutorials online taking you through everything you could possible want to know. Here’s the FiLMiC Pro Quick Start Guide to get you off and running.
But to outline the basics, there’s 3 things you need to think about having a manual control over: focus, exposure and white balance.
Focus
You need to think about what you intend to focus on in the shot. Will this change during the shot? If so, how will you accomplish this? Are you going to use the auto focus to do a kind of “focus pull” for you? Or will you attempt it manually (if you have focus control).
Exposure
This a big topic, which I’m just going to talk about briefly to get you started. Every film or video camera is challenged in low-light (or indeed high-brightness) situations. But the most common situation we find ourselves struggling with is low light.
In a low light situation, if left on auto, your smartphone camera will boost the gain. This often results in video “noise” appearing in your footage. Many people find this to be undesirable and ugly to look at. That doesn’t mean it’s wrong. But it’s something to think about.

In this image (above), you can clearly see the difference in quality. Noisy on the left, clearer on the right. I don’t think one is right and the other wrong. The noisy image has it’s own quality. It’s up to you to decide if you want that.
ISO
To reduce noise in low light situations, the best things to do is try to keep the ISO setting as low as possible. Every camera is different, but a general tip is to keep it at or below 100 ISO.
Read more: Low Light Shooting Tips on an iPhone or Smartphone.
Once you reduce your ISO to that level, you might find the image is too dark for your liking. So what do you do now? Your choice is to either introduce more lighting somehow, or accept that you have to have some image noise.
By the way, you can also remove noise using various software when you come to edit your footage. However, this adds to your job later down the line and I recommend you do everything you can to get the image looking good at the point of filming.
More on ISO for video – the Basics Explained and setting ISO using FiLMiC Pro.
White balance
If you have a white balance setting on your smartphone, play around with it and see how the image changes colour from blue to green to orange and so on. The reason we adjust white balance is to get the colours in our footage as accurate as possible.
Read more: White Balance for Video – Basics Explained
White Balance – Simple Method
Open up the white balance control in FiLMiC Pro:
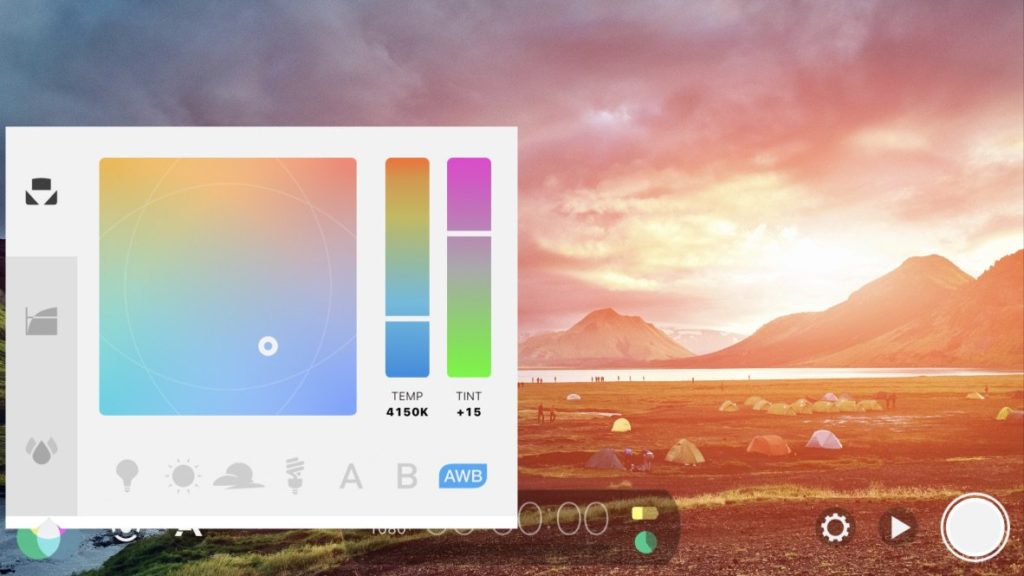
With the meter still in auto mode (you see in this image above the AWB tab is blue), I point at the scene and let the auto function do it’s magic. I look to see if the image on the screen appears close enough to reality. I might waggle the phone around a bit and watch that white circle move around, as it tries to find the best balance. Once I am satisfied it’s close enough, I toggle it onto fixed (the AWB tab goes red), close the screen and get filming. By fixing it, you stop the colour balance changing as you’re filming.
As you can see, my method isn’t particularly scientific but it works for me.
Read more: Frame rates – basics explained
Read more: Shutter speeds – basics explained
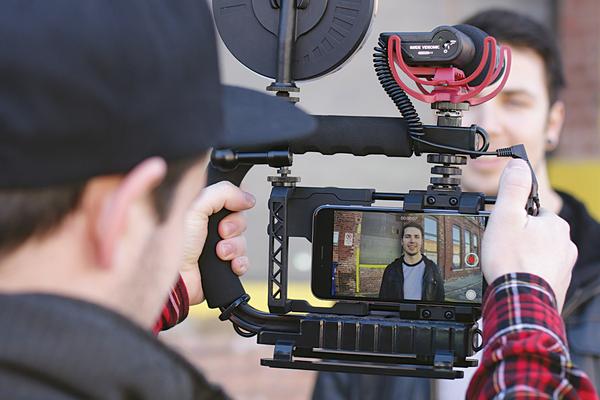
You will need to think about audio
Smartphones have some pretty good inbuilt microphones. Well, perhaps that’s not surprising. Did you know that phones where once audio-only devices? I know, crazy isn’t it?
My phone is a Samsung S9 and the stereo mics are really amazing for picking up crisp and spatial stereo audio.
What these mics are not so good at achieving is that close-mic sound we’re used to hearing in films and TV shows. To get that sound you will have to either use a shotgun mic or a lavalier mic.
As I will keep saying – you can shoot your movie using just the smartphone and it’s inbuilt features, including mics. Even with dialogue or live voice, of some kind. If you film with inbuilt mics, and want to record actors or people speaking, you will have to make allowances for the limitations of these mics. I have done this myself, using Adobe Audition to clean up and treat the voice.
Improvise, be Creative
Andrea and I were filming a Kickstarter video. In one shot, she was going to be moving down an escalator, away from the camera, as she delivered a line. I had her shout the lines, because otherwise the mics couldn’t have picked up what she was saying clearly. But it worked and perhaps added some extra drama to the shot.
Another example of improvising while filming: in the first episode of Silent Eye, there was a scene where the actor, Zoe, was walking along talking to her boyfriend on her smartphone. We were about to shoot the scene with the sound recordist, when it hit me – Zoe is talking directly into the mic of her phone as part of the scene. All she had to do was set her audio recorder running and we could use that audio. I also had the ambient audio from the phone I was using as the camera. In the edit, I combined these two audios, adjusting the levels to get the right mix between the close mic audio and the ambient audio, so it sounded natural.
Using external microphones
Here’s our list of the best affordable mics to attach to your smartphones.
Getting good audio is one of the trickiest parts of making a film. And it’s one area where smartphone filmmakers sometimes don’t put enough thought.
When you’re just getting started as a filmmaker, recording the audio is often bottom of your priority list. The visuals are what gets most filmmakers excited. So that means the focus is on cameras, camera apps, gimbals, etc.
Shoot Silent
We’re into our 5th year running a smartphone film festival and one thing we see is a lot of silent films (by silent, I mean no live voice, but usually music is placed on after).
That’s ok – silent films can be awesome. Telling a story with nothing but visuals can also be a brilliant exercise in filmmaking. It really forces you to think of image and how each image cuts together to tell a story. And, of course, it saves you having to worry about recording audio.
Recording Live Audio
Although recording live audio adds an extra complication to your shoot, it’s not so difficult you have to abandon the idea altogether.
This is what I use (and have used for nearly every film I’ve made in the last 8 years): a Sennheiser MKH-416. This microphone has been an industry standard for decades. But it’s not cheap (about £700). I have a RØDE Boompole plus windshield and pistol grip system. This records onto an external recorder – the Zoom H4N (which I’ve also had for 8 years).
You can buy some great shotgun mics for under $400.
Think About Background Noise When Choosing Locations
To get good audio quality, think about where you are filming . Is it a noisy street with buses and trucks roaring past? Is it a big empty room which will cause the voice to have large amounts of echo and reverberation from the hard surfaces?
One of the most common issues is air conditioning. When you check out a location, and you’re focused on how cool it looks, and because we’re all so used to having air conditioning humming in the background, you might not notice it. Then on the day of the shoot, you’ll find you’re getting a loud hum in the background of all your audio. If you can, get it turned off.
Other hazards are aircraft flying overhead and sirens wailing past. The problem might not seem too bad at the time of shooting. It’s when you come to edit that you discover the headache: if you cut from one shot to the next, and each shot has some or no aircraft sound, or a different tone/volume as it passes, it suddenly becomes very noticeable.
Background noise issues can also be fixed or reduced by using software such as Adobe Audition.
You will need to think about lighting
There’s nothing wrong with shooting your film with available light. I shot my last film without any lighting equipment, including night shots.
We had street lights and car headlights. There were some shots in the woods, so I waited until twilight – that moment when the sun is just moving behind the horizon – so that there was some light, enough to film in, but dark enough that it gave the impression of night. I also used a day-for-night grading style when editing.
The great thing about smartphone filmmaking is you can spend as long as you want experimenting. If you have time before the shoot, go to the location and try some shots with your phone. Don’t be afraid to explore the location and just see how it looks on camera.
When filming, if it’s not looking good on your phone screen, don’t just accept it. Move things around.
Try a different angle, a different camera position or movement. Turn the actor to the light, away from the light, side on to the light – which one looks best? Still not right? Go down the street and see if there’s something more inspiring.
Use What You Have Access To
When I was filming my feature with a consumer camcorder, we had an exterior scene on the street with 2 actors. At the time I worked near the BFI Southbank, and the front entrance was one big white light box. I had already used this in a short film a few months earlier, so I had this scene planned in my head. And rather than light the characters traditionally, I had them stand in front of this wall of light, so they appeared as black silhouettes against it.
I used the environment to my advantage, it looked cool and it was different and cost me nothing. And that’s how you should be thinking if you have no money to make films. Think about all the cool places you know in your town that you can use as a backdrop or lighting effect.
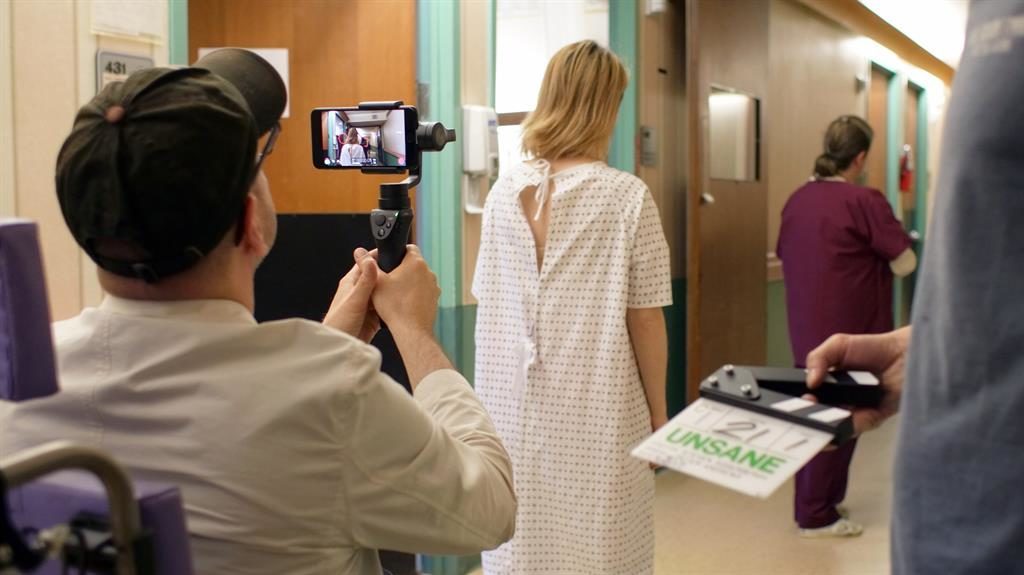
So when I say you should be thinking about lighting, when you’re smartphone filmmaking that means think about what light is on offer to you. Even Steven Soderbergh, who had $1m to shoot Unsane, used available light for 85% of the shots in that film. Be creative, improvise, and your film will look different to the rest.
You will need to think about editing
You’ve been filming for 3 days, you have a few hours of footage, and it’s looking awesome. But will it cut together?
Editing is where you really learn to be a filmmaker. So I recommend you edit your footage yourself.
Editing gives purpose to your shots. Without it, your shots are meaningless. They are like random sentences from a novel jumbled up together. Now you have to place them in an order that creates something visually compelling and tells a story.
At this moment, all the shots you wish you had will suddenly become apparent. You’ll see shots you’ll wish had lingered longer on. Or wish you hadn’t panned just at the moment actor did something amazing.
All those shots you didn’t get, or didn’t quite get the way you now realise would have worked better when cut to another shot, teaches you more about filmmaking than anything you’ve done so far.
But what do you use to edit your film?
I have used Final Cut Pro in the past. But I now use Adobe Premiere Pro. Some people edit in their phones (I’ve never done that).
Here’s a list of the 5 best Android Video Editors.
Read more: Editing Tips
Again, the web is full of more editing tutorials and tips than you can ever watch or read in one lifetime. So here’s what I suggest:
Practice makes perfect…
If you’re just starting out, don’t worry too much about the technical side – just go out and start shooting films. Then, whatever software you choose to edit with, upload your footage and get cutting.
Finish your film.
Your first film will be bad, probably.
But finish it, okay?
Now go out and shoot another one. Because when you shoot this second film, what you learned from editing your previous movie now informs all your shot choices for this one. All those shots you wished you had when you were trying to cut that clumsy footage into something not too clunky and ugly – all that pain and sweat – will now drive you to get better footage.
There’s no way you’re going through that pain again, right?
So you return with the footage for your second film. And guess what… lo and behold, it’s a little less painful to edit than the last one.
Finish your film.
Make another film
That’s right. It’s time to make your third film, already. Wow that time passed quickly, didn’t it?
So you start filming and this strange feeling comes over you. A feeling that, hey, you almost know what you’re doing.
…almost.
So you find yourself hunched over your PC or MacBook or whatever you’re using. And yes – the new footage is actually cutting together quite nicely. You’re feeling pretty proud of yourself, because you imagined this shot would go to this shot and then this shot.
And holy shit – it actually worked, exactly as you thought it would!
You will need to think about casting and directing actors
Only if you’re intending to shoot fiction, of course. I won’t say too much about this, you should just go and try it. I would recommend you also have a go at acting yourself, to see how it feels in front of the camera.
Cast your friends and family. Build your story around the characters you know. Give them parts that suit them.
Right, I think that’s enough to get you started.
Good luck and have fun!

Smartphone Video – Beginner to Advanced
If you want to know more about smartphone filmmaking, my book Smartphone Videography – Beginners to Advanced is now available to download for members on Patreon. The book is 170 pages long and covers essential smartphone filmmaking topics:
Things like how to get the perfect exposure, when to use manual control, which codecs to use, HDR, how to use frame rates, lenses, shot types, stabilisation and much more. There’s also my Exploring the Film Look Guide as well as Smartphone Colour Grading.
Members can also access all 5 episodes of our smartphone shot Silent Eye series, with accompanying screenplays and making of podcasts. There’s other materials too and I will be adding more in the future.
If you want to join me there, follow this link.

All encompassing and very inspiring. Thank you Sir, for putting this out. It will help a lot of people looking to take the plunge
[…] MonoShot – Test express (français) ONF StopMo Studio dans l’App Store. Photos et vidéos numériques : Matériel, trucs et astuces. Photography Kit for iPhone 6/6s and iPhone 6 Plus/6s Plus – Apple. The Ultimate Beginner's Guide to Smartphone Filmmaking – Mobile Motion. […]
[…] Guide to Smartphone Filmmaking – Mobile Motion. [online] Mobile Motion. Available at: https://momofilmfest.com/the-ultimate-beginners-guide-to-smartphone-filmmaking/ [Accessed 13 May […]
[…] listes des meilleurs matériels et le guide par le Mobile Motion Film […]
[…] a compact design, excellent battery life, and intelligent functions, the OSMO Mobile 2 makes smartphone filmmaking a […]
l I’m interested in this smartphones film making but how can l be tutored properly so as to get the job done excellently? l want to shoot my own film for the first time in my life.
Thanks for your comment! The honest answer is that like other art forms, filmmaking takes practice to get good at. Like painting, dancing, playing music and so on. There really is no easy way or shortcut to becoming good. That’s why we created the FREE Film School with lessons to teach yourself how to become a professional filmmaker.
I suggest this needs a section on recording stereo audio in an era where phones no longer come with audio jacks.